
Arty October: Make Do and Modify

Gustav, by Jenna Fowler
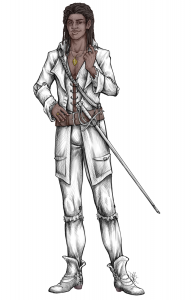
Coloured by Ste Coffey
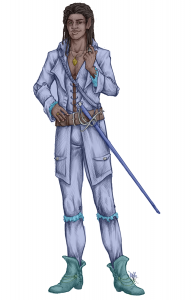
Along with a second colouring (and other minor edits)
Make Do and Modify
In the first post of this month I talked about how to comb the creative commons – finding stuff that fits well enough to the idea you’re working on.
But when you’re trying to be creative, to step into unexplored realms of fantasy, there may not even be that – especially if you don’t have the funds to buy high quality stock art – and even if there is “good enough” never really feels like it’s good enough.
To get the best results from the creative commons – or from novice artists – you need a handle on image editing and adaptation. Transforming an image from what it is to what you wish it was.
For our fantasy works one vital trick has been demodernising – giving modern day photos the appearance of paintings or illustrations that suit a fantasy feel. There are two steps to that: First you must remove any clearly anachronistic elements and then you can put the image through various pre-made filters like GIMPs “oilify”.
Demodernising
Removing the anachronisms can be simple, just cropping out the electricity pylon on the edge of a photo of a village, or it can be more complicated – removing a deck chair from the middle of the courtyard you need to depict.
The most vital tools for me in dealing with the more difficult cases have always been copy-paste and recolouring: a deck-chair against a wall can be overlaid by another portion of the wall, with the blur that will be introduced by oilify or similar tools hiding the minor seams. Meanwhile the green wellies worn by a medieval re-enactor on a muddy field can be turned a deep brown and simply be leather boots within the image.
Using filters like oilify seems like a trivial task – and honestly it can be. But for best use it’s important to think about how real painters work. Unlike a photograph not every portion of a drawing or painting is equal in resolution, but rather they have a level of detail decided by how much the painter, and the audience, care(s) about them – in a portrait the subjects face may be almost photorealistic while the background is merely lumps of colour in the rough form of furniture. As such it helps to separate portions of the image and use the filters more or less strongly on them depending on how important they are to your final composition [and on how many minor errors you need to hide].
(Re)colouring
A lot of creative commons stuff is black and white, or coloured inappropriately for what you have in mind. Recolouring is thus an important tool to have in your repertoire as it greatly expands your options – see Gustav at the top for an example.
For colouring monochrome works I rely on layers. A basic tool available to digital editors that makes the process far easier than it would be on paper, layers in an image editing program are pretty much the equivalent of laying transparencies atop one another to make the full image. But they come with some snazzy options that make the whole process a lot smoother. By altering your layers’ transparency settings and order you can use wide swathes and then add detail on top – colour in the whole torso, and then colour in only the belt atop that. More importantly for me you can put the original image on top in a darken-only layer which allows the textures and detail that the original black-and-white artist created to shine through.
I generally use Krita for this as I find its brushes more useful for the process, and everything a little easier to organise, but it is a little slower.
If working with something that’s already in colour I have two options to hand – the first and most prevalent is to use the GIMP colour editing options to alter what each colour on the existing image is. Changing all the reds to purples or making all the blues more vibrant can work wonders. The second is to simply make the piece monochrome and then go from there.
There’s a lot more to say on the subject, and I promise I’ll come back to it in more depth, but for now I need to get prepped for my NaGaDeMon project, a 13th age monster for each day of November. If you have any questions or advice about image editing, be sure to let us know!